Search This Blog

Showing posts with label Bull dogs. Show all posts

Thursday, May 9, 2013

Bull Dog Draw-a-Long

A few posts back I said I was going to write out the script for the bull dog Draw-a-long. These are the steps I use when doing it with the younger grades. As you can see they are very precise, which is important for every learner to be able to follow along and be successful. This lesson builds confidence because they are so EXCITED when they finished to see a dog that looks so realistic. The open ended background allows for SO much creativity to happen. This is a great drawing exercise for any grade level k-5th! 

Get your pen ready and HAVE FUN! 
I would LOOOOVEEEEEE to see your finished bulldogs to add to the bottom of this post!! Send them to 
www.natty241@hotmail.com 
Be sure to color ALL of your background!  :-) 


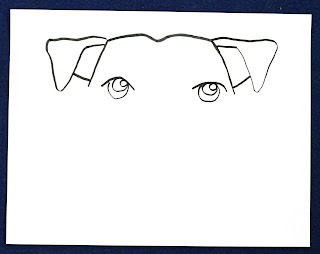
1. Begin with a line at the top with a little wrinkle. IT should be longer than your finger 


                    2. Then draw two diagonal lines about the same length as your finger


 3. Then draw two lines at the top. One long and one short


 4. Then connect the lines with a letter "V" and draw a small line from the head to the "V"


5. The begin the eyes close to the BOTTOM of the ears. NOT inside the forehead. First Draw a tiny rainbow, Papa circle (iris), Mama circle(pupil), and baby circle (reflection of light).


 6. shade in the mama circle (pupil) black and draw the "smiley" line under the eye


 7. draw a wrinkle like an upside down "T" right above the eyes (not under the eyes) and make a huge rainbow that touches BOTH eyes AND the wrinkle.


 8. Draw a "follow the leader line" right under the rainbow (very close to the rainbow)for a wrinkle. Then make the nose as big as the eye, starting with a sideways curly letter "C"

 9. draw the bottom of the nose like a letter "V" and a tiny line in the middle. 


10. Then draw a tiny line under the nose. Then draw a tiny letter "A" 


11. then make two tiny tiny rainbows under the "A"


12. Then make the "A" bigger and draw a "smiley" line for the bottom of the tongue


 13. now draw a line from the "A" downward  and back up towards his eye, and make a little smiley line.


 14. draw a "follow the leader line" from one smiley under the tongue and back to the other smiley to make the inside of his mouth


 15. now fill it in black and the tiny part of the letter "A". Also add the wrinkles above the eyes and on the forehead


 16. Now draw the outside of his face beginning back up at the original diagonal line we started with, all the way down, following the leader, under his lips, make a slight dip for his chin and back up the other side to the other diagonal line


17. Now make a dash line all the way around his neck


18. draw the spikes beginning in the middle and coming out through the open dashes


 19. now draw a line from half way up his head all the way down to the bottom of the paper on both sides for his body

 20. YAY You finished!! Now you can color him and create an interesting background using something you have learned this year! (fun letters, puzzles, one point perspective, checker boards, op art,fun fonts, graffiti, etc)

Monday, May 6, 2013

Catching Up... Lots of Fun Stuff!

The past few years, I have received numerous emails about how to make the monster Alien head and the 3-d lizard head. Today I took some pictures to show the steps of how to create the head. It is very simple and can be done with 2nd -5th successfully. When making the monster, add eyes, ears, horns, antennae, teeth, tails, legs, spots, the possibilities are endless!  This is also the same head for the Easter bunny puppet. There is a link to those lessons below. 


You will need a piece of tag board/card stock about 8 1/2 by 11 for the monster a little bit smaller piece for the lizard. Fold in half 

cut in half and fold the tops down along the side edge
                                 Then cut off the bottom and discard. The top pieces should be perfect squares                                                  

                         
                                     Fold the squares diagonal the other way, so that you see an "X"

                                      Cut one side of the "X" and stop in the middle
                                     
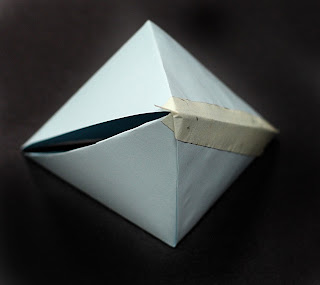
                                        glue those sides together to make two tiny pyramids

                                       tape them together evenly on the back

                                    And now Go to TOWN turning it into some kind of creative creature!!

We have been doing so many things in art and I have just not had time to post lately. If you would like to see more detailed directions, or step by steps of these lessons, please leave a comment. I LOVE hearing your feedback and knowing what you like to see on the blog so I can post more about those things....I haven't heard from you in a while.

                          Fifth graders are working on a grid creating self portraits
                         Some classes are creating free form paper mache sculptures
                                       We are painting them tomorrow! WOOHOO!


Since the end of the school year is nearing, some grades are finishing up their larger scale projects and doing one day projects for fun. This city project is SUPER fun and simple. I actually get an APPLAUSE when I open the paper to reveal the print!!

This works best on regular zerox copy paper. First look at images of city skylines and talk about the shapes of the buildings, the sky and the reflections on the water. Then draw the city starting at the horizon line with trees, a road, and a bridge. Then draw the smallest buildings first so they can overlap the larger ones. They use a yellow crayon for the windows, stars, and fireworks, then color over them with marker to make a crayon resist when printed


The you spray water on the WHITE part of the paper and fold to print


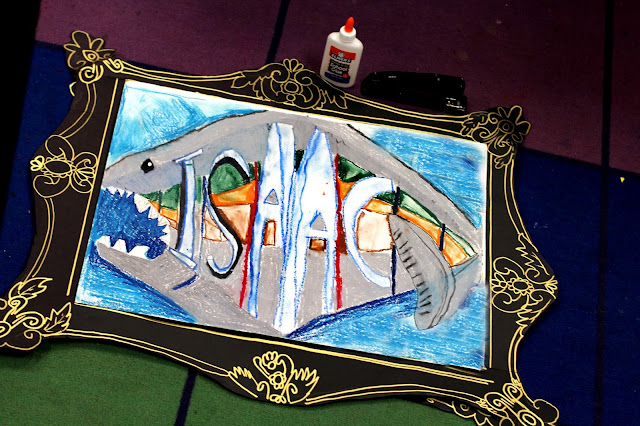
Some fourth and fifth graders are finishing writing their names using two point perspective. This was a fun and chelenging lesson. I think they learned ALOT and have been using this technique in their free drawings for fun! They made HUGE frames with strips of large black paper and gold paint pens
I was inspired by this post by the amazing Aly Marcotte at Artisan Des Arts, go check out her awesome blog!! http://artisandesarts.blogspot.com/2013/03/eye-study-grade-56.html


 kinder, 1st and 2nd grade made "Planet Power Pugs" For Earth Day! They turned out fabulous!


 We also did a Draw- A-Long Bull dog last week and each student gets to create a very unique background! If you would like me to post the steps and script to create these bull dogs, let me know and I will. I finally figured out perfect steps for %100 successful bull dog looking bull dogs! They are SO cute and a GREAT confidence builder for shy artists! Some of the first graders told me that their parents did not believe that they had actually drawn it!! So much fun! Many students used our Graffiti letters to write their dog names in the background and the two point perspective lesson to create backgrounds as well! I love seeing them apply what they have learned in open ended projects and free draw!


Total Pageviews